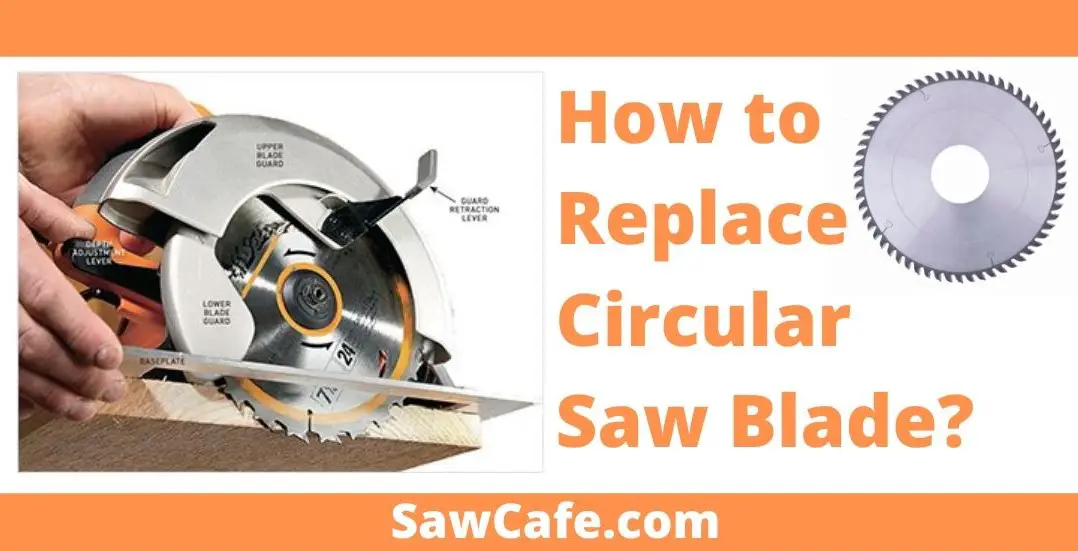
If you are a woodworking professional, you may have to change your circular saw blade regularly. We want to show you how to change a circular saw blade with ease. As we know, your blade will need to change from time to time when you use it daily. Frequent or regular use of a circular saw will wear out the blade’s teeth or even break a tooth. You just need to know when and how to change saw blade on circular saw. When you observe that the teeth are becoming worn out or the machine is no longer cutting as it should, you need a blade replacement.
How to change saw blade on circular saw?
As explained already, when you observe that your circular saw isn’t cutting as smoothly as it should or a tooth is worn out, you need to carry out a blade replacement. This is not a difficult task.
If you understand the process of replacing a circular saw blade, then you will be able to complete the task in a few minutes. Below are the steps required for the circular saw blade replacement.
1. Unplug the machine from the power source:
When working on any machine, the rule of thumb is to ensure that it is not plugged to any electrical outlet. If your machine is connected to a power source, ensure that you disconnect it before doing anything else.
Some circular saws are battery-powered. If yours uses batteries too, remove them before trying to change the blade.
2. Move the guard aside:
When you are sure that it is safe to work on the machine, look for the blade guard. Move it aside. This development will give you access to the saw blade. You do not need any experience or expertise to move the guard. It is easy to move.
3. Look for the bolt on the side:
After moving the guard aside, you will see a bolt in the center of the blade. You have to unscrew the bolt before you can remove the blade.
4. Unscrew the bolt:
We told you that you must unscrew the bolt before being able to remove the blade. The bolt screws the blade to the machine, which means that the bolt must be tightened before you can start operating the circular saw.
To unscrew the bolt in question, hold the blade firmly to prevent it from oscillating while trying to unscrew the bolt. You can use a pair of pliers to hold the blade or a pair of vice-grip pliers. Vice-grip pliers will make it more comfortable for you to hold the blade.
5. Use a spanner to unscrew the bolt:
When you hold the circular saw blade firmly with vice-grip pliers, hold a spanner with the other hand, and unscrew the bolt that secures the blade to the saw or machine. When the bolt eventually comes off, remove the washer nut that secures the bolt. Slide the blade away from the guard to remove it.
6. Install a new blade:
To install a new blade, follow the same procedure you used to remove the blade. Let us explain better to avoid a mistake. Install the new blade where you removed the old one. Ensure that the hole in the center of the blade aligns with the one on the circular saw.
7. Insert the bolt:
Before inserting the bolt, fix the washer nut. Let it align with the holes on the blade and the saw. Now insert the bolt. Use your fingers to tighten it a bit.
8. Use the vice-grip pliers to hold the blade:
To prevent the blade from oscillating when tightening the bolt, hold it with the vice-grip pliers. If you do not have that tool, you can use regular pliers.
9. Tighten the bolt with the spanner:
When the blade has a firm grip, use your spanner to tighten the bolt. Make sure the bolt is secure so that the blade doesn’t go off when the saw it’s functioning. The consequences can be fatal. Now, you have successfully replaced your saw blade.
How to sharpen a circular saw blade with a Dremel?
If your circular saw blade gets dull, don’t hesitate to change it. There is no problem if you prefer to sharpen it as opposed to changing it. Dremel is a versatile tool. However, to sharpen your circular saw with it, the following steps will be helpful.
1. Wear a pair of thick gloves:
The first safety precaution when working on any blade is to wear thick gloves. These gloves will prevent the blade from cutting you in case of a domestic accident. Some blades can cut through thick gloves, but the injury will be minimal compared to the injury you can suffer when you do not protect your hands with gloves.
2. Carve a small piece of wood:
Carve a small piece of square-shaped wood, then attach a small wooden cylinder to it. Make the diameter the same as the hole in the circular saw blade. Place the blade on the wood slab by allowing the cylinder to pass through the hole. This idea enables you to keep the blade firmly while sharpening it.
3. Activate the Dremel machine:
To activate the machine, plug the cord into a power outlet and then switch it on. It will produce a sound that shows that it is functional. When you switch on your Dremel and it doesn’t produce any sound, it may no longer be functional. Before switching it on, place it at a 90-degree angle either on the left or on the right.
4. Start sharpening your blade:
When the Dremel is on, move the blade close to it so that a tooth on the blade touches the functioning machine. While the Dremel is operational, the blade tooth is being sharpened. Do this for each tooth until all the teeth are sharp.
To avoid confusion, you can mark the tooth you are starting with. When you rotate the blade as you sharpen each tooth and return to the marked tooth, you know that you have sharpened all the teeth on the blade.
5. Turn the Dremel to the opposite 90-degree angle:
After sharpening all the teeth on one side of the blade, turn the Dremel to the opposite 90-degree angle. Now change the side of the blade on the small square wooden slab just as you did initially. Sharpen the teeth on the other side of the blade following the previous process. When you are through, then you have sharpened your blade with a Dremel successfully.
In this write-up, we tried as much as we could to show you how to change the circular saw blade, as well as how to sharpen your blade with a Dremel device. Sharpening your blade may take some time as you need to sharpen each tooth individually. It is better than filing the teeth manually, though.

