Do you know that a DIY wooden picnic table is possible even without prior knowledge of furniture making? When you have a picnic table, you can always enjoy regular picnics with loved ones, especially when the weather is pleasant. With a sturdy picnic table, spending time outdoors will become more fun. We will show you DIY picnic table ideas today.
There are so many cool picnic table designs available if you search online. Just you need to learn the basics about making it successfully. You’ll be able to make the same design if you follow our easy basic steps. To do this, you need certain tools. It would help if you had either a circular saw or a miter saw for woodcutting.
DIY Picnic Table Ideas – How to Make a Picnic Table?
To build a picnic table, the first thing is to ensure that all the materials, including necessary tools, are available. You need the right sizes of wood or lumber and the appropriate tools.
Tools Needed:
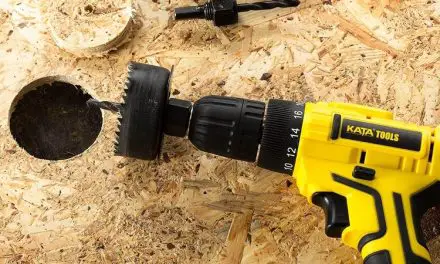
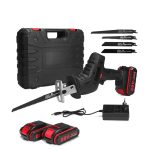
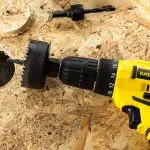
These are the tools needed for making successful DIY mini picnic table plans: saw, power drill/driver, sandpaper, and clamps. Ensure that you get all these tools before you begin your project.
Pieces of wood Needed:
To make the wooden table and benches, these are the wood dimensions you need:
2 x 6 inches (15 pieces)
2 x 4 inches (7 pieces)
It may interest you to know that you can get all these planks or timbers in the market. So, you do not need to stress yourself trying to cut wood to these dimensions. You can purchase them for your project.
Wear thick gloves and a dust mask:
When your materials are available, and you’re ready to start working on your project, wear a pair of thick gloves and a dust mask. You can wear safety goggles as well, to prevent dust from entering your eyes.
The dust mask, on the other hand, prevents the nose from site dust or sawdust. When it gets into the nose, it can make you uncomfortable. Also, thick gloves are advisable when handling machines with sharp blades.
To assemble the table frame:
Lay 5 pieces of your 2 x 6-inch wood facing down. You can lay them on sawhorses. Place them side by side but leave about 1/4inch between each lumber. Cut three battens about 2.5ft each. Glue them to the board. Place two battens close to the edges of the two short ends of the table then place the third one in the middle. This will hold the lumbers together and provide stability for the tabletop.
Pre-drill holes in the battens:
Pre-drill holes in the battens you attached to the tabletop. Use your power drill + driver for this, then tighten the screws. You should drill holes at the opposite ends of the two battens at the short ends of the board while the middle batten requires just one hole.
Attach the legs to the two outer battens:
Attach the legs to the two outer battens around the ends of the table. Here, you need four 2 x 4-inch lumbers. Apply some glue or adhesive to stick them to the board as you did with the battens. You need four legs- two on each side of the table. That is two legs for each outer batten.
To make your table stable and balanced, position both legs on each side diagonally, forming an “A” shape. Now, use your driver to screw the legs to the battens through the pre-drilled holes. You can equally use carriage bolts and washers to fix the legs to the tabletop.
Support the legs:
For more stability, you need to support the legs of your table. Attach two 2 x 4-inch planks to the two legs on each side, respectively. To do this, pre-drill holes on the planks as you did previously. Apply your adhesive then insert screws to clamp the support to the legs.
After that, connect two additional planks from the new support to the middle batten. You can call these the braces. Apply your glue again, and then screw in. Do this for the legs on both sides, and your table will be stable and sturdy. Turn the table so that it now stands on its legs. As you can see, your table is ready.
To make the benches:
Place two 2 x 6-inch pieces of wood side by side. Leave about ¼-inch in between. You can use a spacer to create this space. Get a batten as you did for the table. Apply your adhesive on it and stick it to the board in the middle.
Place the bench on the extended end of the table support:
Place your bench on the extended part of the table support. The plank crosses the two legs on the side of the table, forming the A shape. Screw them in with about 2 and 1/2-inch carriage bolts.
Do this for the other side of the table to fix the second bench. Your picnic table should be completed now.
Use a circular saw to cut corners of the table:
It is advisable to cut the corners of your table and the benches to prevent injuries when someone bumps into the sharp corner. You can cut it at an angle of 45 degrees using a circular saw. A jigsaw is equally ideal for this purpose.
Apply wood finishing:
Now that your table is ready, you can use sandpaper to sand the furniture piece to make it smooth. This development will eliminate rough edges. When you are through with the sanding, you can polish your wood to leave it beautiful and weatherproof. You can now start using your picnic table.
FAQs:
Q: What materials do I need to make a DIY picnic table?
A: To build a basic picnic table, you will need 2 sets of lumber boards, 4 short fence posts or 4x4s, screws, and wood glue.
Q: How long does it take to assemble a DIY picnic table?
A: Depending on the complexity of your design and your skill level, it may take anywhere from one hour to several days to complete the assembly.
Q: Where is the best place to buy materials for a DIY picnic table?
A: You can purchase all necessary materials for your project at most local hardware stores. Additionally, many home improvement retailers offer online ordering options with delivery or in-store pickup.
Q: What type of wood is best for a DIY picnic table?
A: Softwoods such as pine and cedar are often used to build picnic tables because they are lightweight, easy to work with, and inexpensive. Hardwoods such as oak and walnut will also last longer but tend to be more expensive.
Q: How do I secure the boards together when building my picnic table?
A: You can use screws, nails, or even a combination of both to securely fasten the boards together. Additionally, you can use wood glue for extra strength and stability.
Q: What tools do I need to build a DIY picnic table?
A: You’ll need basic carpentry tools such as a saw, drill, hammer, screwdriver, and measuring tape. Additionally, you may find it useful to have safety glasses and a woodworking square for accuracy.
In conclusion, a DIY picnic table is an economical and practical way to create the perfect outdoor space for your family. With just a few simple supplies and tools, you can easily create a stylish and functional picnic table that will last for years to come. Whether you need seating at the beach or want to host alfresco dinner parties in your backyard, these DIY picnic table ideas provide plenty of inspiration for creating an enjoyable dining experience outside. So get creative and start building!
