

We found out that many woodwork beginners and DIY enthusiasts find it a little difficult to measure and cut trims even though the task is not so difficult. That’s why we took it upon ourselves to come up with an article on how to measure and cut trim with a miter saw. All you have to do is to read it to the end. It is very interesting.
Apart from a miter saw, you need a measuring tape, a piece of paper, and a pen. You have to start the measurement with the door trim. For accuracy, the door trim has to be in place before you measure the floor trim. The floor trim will terminate into the door trim. As a safety measure, you should always keep your fingers away from the blade of your miter saw. In all you do, always put safety first.
How to Measure and Cut Trim With a Miter Saw?
Measuring the door trim:
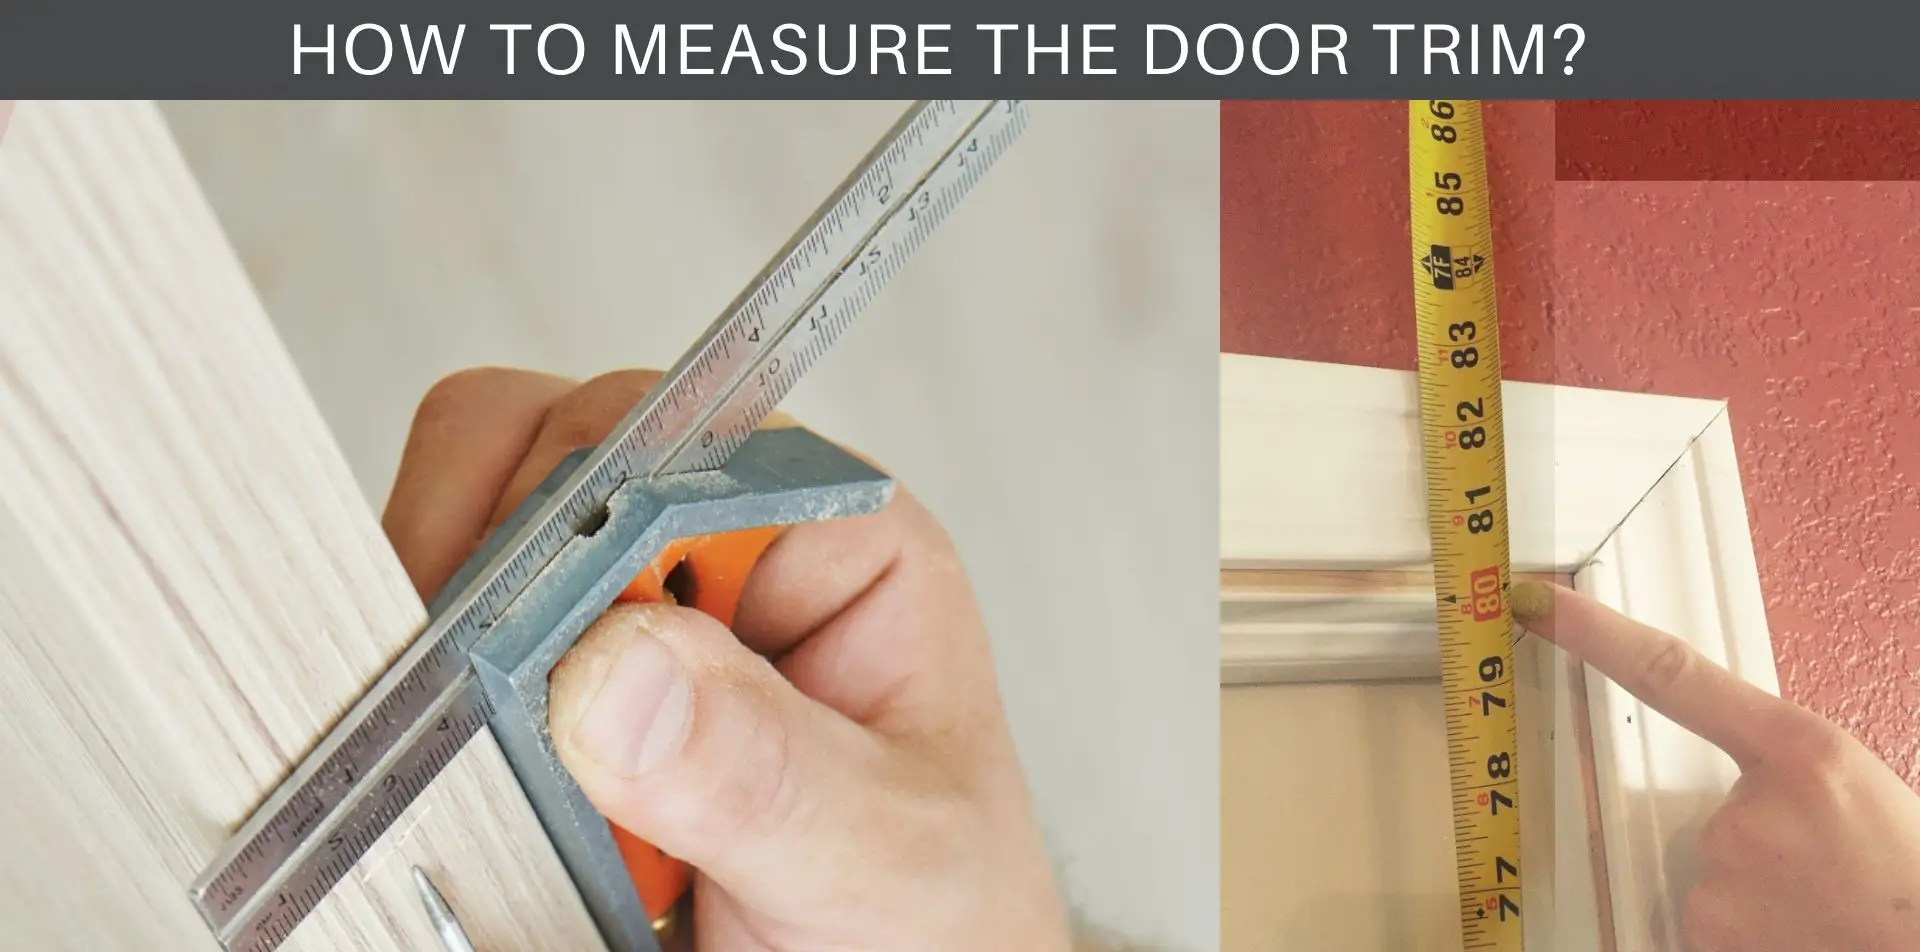
First Step: Open the door and start your measurement from the floor on the left side of the frame. Measure it to the top of the frame and add an extra quarter inch to the top. Write the measurement on a piece of paper so that you won’t forget.
Second Step: Start your measurement from the floor on the right side of the frame. Measure it to the top of the frame and add an extra quarter inch to the top. Write the measurement on a piece of paper so that you won’t forget.
Third Step: Measure the interior of the door frame. Measure it at the top, in the middle, and at the bottom. Use the one with the highest figure. Add an extra half-inch to the figure. Write the measurements on the same piece of paper.
Cutting the door trim:
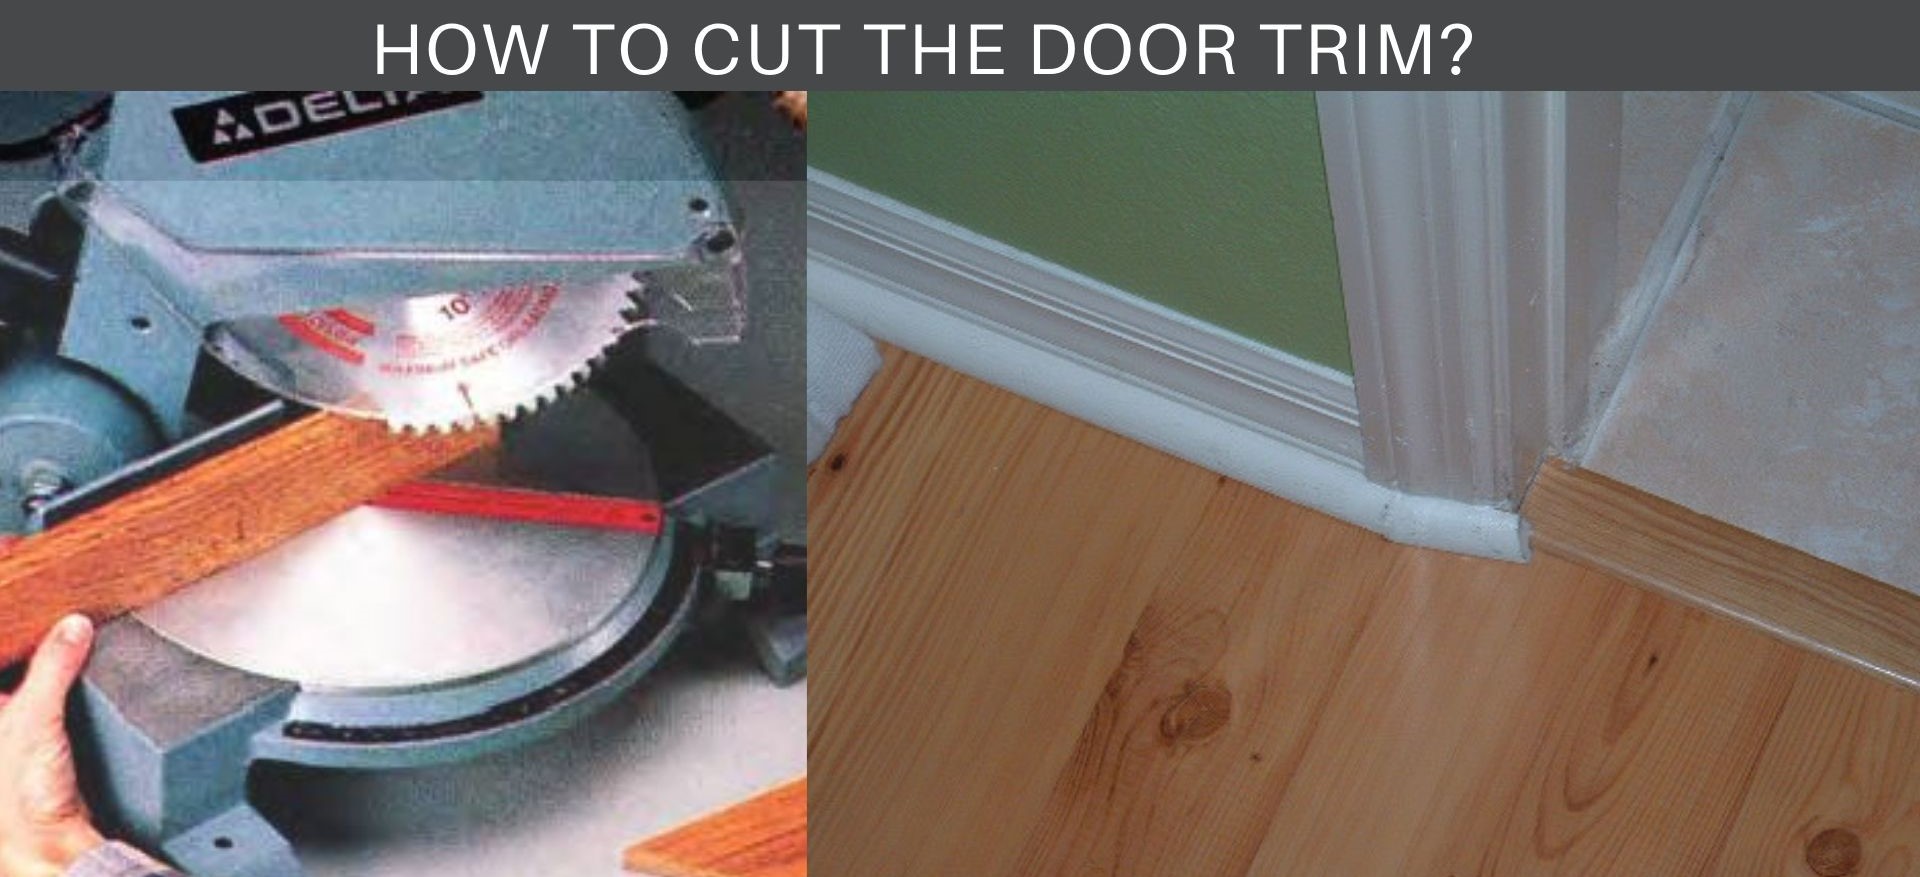
First Step: Place the bottom edge of the door trim into the miter saw. Position it in such a way that the edge of the trim will be in the middle. The door trim should be made to face up.
Second Step: Now, you should align the bottom edge of the piece of trim, a little above the 90-degree cut slot. Then you can cut a clean edge. To do that, you’ll pull and run the blade gently across the face of the trim. Ensure the blade runs through the whole of the trim.
Third Step: Align the mark and cut the miter by pulling and pushing the saw across the face of the trim. Let the blade run through the entire trim. This is for the left door trim. You can do the same for the right trim.
Fourth Step: Finalize the last trim and that’s it. This is not as easy as it sounds, but the more you do it, the better you will get at it. Don’t procrastinate. It is better to go and try it now that the knowledge is still fresh. When you become perfect with the door trim, you can take it a step further by measuring and cutting floor trim.
Safety Tips with a Miter Saw:
A miter saw is very useful, but it is also very dangerous when it is not managed well. So, we have decided to give you a few safety tips.
1. Always wear safety gear:
You must have heard about kickbacks. It is when a saw kicks a piece of wood back forcefully. It will come with a strong force and if it hits you with the impact, you could be seriously injured. That’s why you should position yourself properly when cutting wood. Stay away from the kickback path.
More importantly, you need to wear protective gear. Wear goggles to protect your eyes from sawdust and wood chips that could be sent flying in the air. Cover your ears with earplugs because of noise. Wear shoes that can cover all your toes. In case a heavy object, like a hammer or pieces of wood, accidentally drops on your feet. When your feet are covered, the impact will be reduced.
Avoid wearing clothes with loose-fitting. Your clothes should be tightly fitted on your body. A heavy machine can pull clothes with loose-fitting. Don’t forget to protect your fingers as well. Remember, your fingers come closest to the blade of your miter saw.
2. Keep your work area clean:
Vacuum your workshop on a daily basis. Remove all stock, cutoffs, and sawdust. Your table should also be very clean and free of unnecessary items. You can easily make clean and accurate cuts on a clean table. This can be difficult if your table is untidy
3. Study and learn about your equipment’s safety features:
Your miter saw comes with several safety features. You can only take advantage of these features if you study them very well. Knowing the right safety feature to activate could avert disaster or reduce its impact. Heavy machinery comes with blade guards, anti-kickback pawls, and more.
4. Disconnect from power before changing the saw blade:
Whenever you want to remove the blade or fix anything in your table saw, it is necessary to disconnect the equipment from power totally because you could mistakenly hit the power button and switch it on. You should also stand properly while using the saw. As mentioned earlier, stay out of the kickback path. In case it occurs, you won’t be hurt.
Signs when your blade is dull:
A lot of beginners don’t know when to change the blade of their miter saw and this takes its toll on the outcome of their cuttings. To avoid that, we have listed a few signs that indicate that your blade is dull.
When you begin to hear loud sounds from the saw, it may be a sign of dullness. Start making plans to change the blade. Also, if it is difficult for you miter saw to follow cut lines, It may be an indication that your blade is dull. Finally, when the cutting speed of your miter saw continues to reduce, you might have to sharpen the blade or change it.
You have not only learned how to measure and cut trim with a miter saw, but you have also learned some important safety tips and most importantly, you have learned the signs your blade will show when it becomes blunt or dull.


