

A miter saw is the best method to find that angle just perfectly. If you would like to cut baseboard corners without a miter box, then you have to know how to cut baseboard corners without a miter saw.
If you’re wondering whether it is possible to cut baseboard corners without a miter saw — it is. Nonetheless, there’s an artwork to accomplish this properly so that your baseboards profile regarding the joints alignment and baseboards angle wed upright to your floor and walls. There are lots of techniques you may use, and every one of these needs a different instrument for cutting-edge molding, if it is your regular baseboards or crown molding.
Since you can choose from different tools to do this, it ought to be easier for you to replace a miter saw and use something like a regular circular saw, hand saw, or jigsaw cutting pieces of molding. They are very cheap and will make your task easy.
How to Cut Baseboard Corners Without Miter Saw?
Baseboards can be an attractive addition to any room. However, they take patience and precision when installing them around corners. In the past, a miter saw was necessary for making corner cuts in baseboard installation, but there are now other options available that don’t require this tool. This article will discuss how you can cut baseboard corners without a miter saw.
1. Using a Hand Saw:
One of the simplest ways to make corner cuts in your baseboard is by using a hand saw. This is especially helpful if you need to make small adjustments since it is easier to maneuver than a power tool like a miter saw. To make a cut with a hand saw, you’ll need to mark the cut line on both pieces of the baseboard. Then, use a straightedge or speed square to extend the line across and onto the edge so that it is visible from both sides. Make sure that your lines are perfectly straight and then carefully cut along them with your saw. If your handsaw has teeth on one side only, make sure that you are cutting in the direction of the teeth for a cleaner result.
2. Using an Angle Grinder:
An angle grinder is another tool that can be used to cut baseboard corners without a miter saw. This tool has the advantage of being able to make larger cuts than what can be done by hand. To use an angle grinder to cut baseboard corners, you’ll need to mark the cut line on both pieces of the baseboard. Then, use a speed square or straightedge to extend the line across and onto the edge so that it is visible from both sides. Make sure that your lines are perfectly straight and then carefully make the cuts by slowly guiding the angle grinder along them.
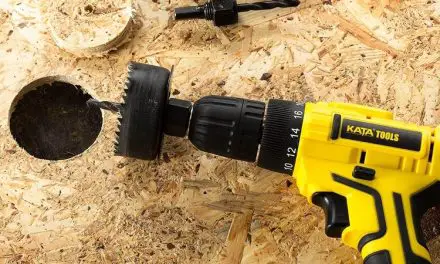
3. Using a Jigsaw:
A jigsaw is another tool that can use to cut baseboard corners. To use a jigsaw for this task, you’ll need to mark the desired cut line on both pieces of baseboard and then extend it across with a speed square or straightedge so that it is visible from both sides. Make sure that your lines are perfectly straight and then carefully make the cut by guiding the jigsaw blade along it.
How to Cut Baseboard Corners Using a Hand Saw?
Baseboards are an important finishing touch for any room. Precisely cutting the corners of the baseboard can be tricky, especially without the right tools. But don’t worry – it is possible to cut baseboard corners using just a hand saw! This guide will walk you through the steps required to cut perfect corners with a hand saw and ensure you have professional-looking results.
Gather Required Materials:
Before starting, make sure you have all materials and tools necessary to complete the job. You will need:
- A hand saw (preferably a fine tooth one)
- Pencil or marker
- Tape measure
- Carpenter’s square
- Sandpaper (optional)
1. Measure and Mark the Corner:
The first step is to measure and mark the corner you need to cut. Take your tape measure and measure the length of each side at the corner. Make sure to take into account any angles or curves in the wall that might change the measurement, as this will affect how you cut. Once you have your measurements, use a pencil or marker to draw a line on the baseboard marking where it needs to be cut. If possible, also draw an angled line from one side of the corner to another so that you can follow it when cutting.
2. Cutting the Corner with a Hand Saw:
Once you have your corner marked, it’s time to get cutting. Start by placing the hand saw in the spot where the corner needs to be cut and angle it so that it follows your drawn line. Begin gently pushing the saw forward, gradually increasing pressure as you go, until you reach the other side of the corner. It is important not to rush this step in order to ensure a smooth cut.
3. Smoothing Out Rough Edges:
If there are any rough edges on your cut baseboard corners, you can use sandpaper or a file to smooth them out. This is optional but will give you professional-looking results. Use light pressure when doing this and check frequently for progress until the edges are even and smooth.
4. Finishing Touches:
Congratulations – your baseboard corner is now cut! Before you move on, make sure to check that the corner fits properly against the wall or other baseboards. If any adjustments need to be made, you can use a rasp or plane to carefully shave off small amounts of wood until it fits perfectly. This is also a good time to do touch-ups with sandpaper if needed before applying paint or sealant for an extra-polished look.
Cutting corners using just a hand saw may seem daunting at first, but with a few simple steps, it’s not as hard as it looks! Armed with the right materials and tools and careful attention to detail, you can achieve perfect baseboard corners that look professionally done. So don’t be afraid to give it a try – your home will thank you for it! By following this guide, you are now on your way to learning how to cut baseboard corners using a hand saw with ease and precision!
How to Cut Baseboard Corners Using an Angle Grinder?
Baseboard corners can be one of the most difficult parts of installing or replacing baseboards. If you’re using standard wall angles, creating square corners with a miter saw is simple. However, if you need something more intricate, such as curved or angled corners, an angle grinder can provide a much faster and easier solution. In this guide, we show you how to cut baseboard corners using an angle grinder.
1. Safety Measures:
Before beginning any project that involves power tools, it is important to take the necessary safety precautions. Always wear protective goggles when operating an angle grinder, and consider using a dust mask as well. Also, be sure to unplug the grinder when changing the discs.
2. Choosing the Right Disc:
When cutting baseboard corners with an angle grinder, it is important to use the right type of disc for the job. For most projects, you will want to use a diamond-tipped blade designed specifically for cutting wood or other materials that are similar in texture and hardness. This type of blade will produce smooth cuts and reduce the risk of splintering or chipping your trim pieces. Be sure to select one that is rated for use on both hardwoods and softer woods, as this will give you more versatility when working with different types of wood trim.
3. Preparation:
Before beginning your project, measure the corner to determine the size and shape of cut you will need to make. Mark your cutting lines clearly on each piece of trim using a carpenter’s square or triangle. This will ensure that your pieces are perfectly aligned when they are installed. It is also important to clamp down the pieces in place before cutting them to avoid any potential kickback from the angle grinder.
4. Making the Cut:
Once you have chosen your disc and marked out the cuts, it is time to start cutting. Begin by setting up your angle grinder according to the manufacturer’s instructions; this typically involves attaching a guard at an appropriate distance from the blade. With your safety gear on, plug in your grinder, and begin making the cut. Move slowly and steadily with the angle grinder to avoid any splintering or chipping of the trim pieces.
5. Cleaning Up:
Once you have finished cutting, unplug your grinder and remove the guard. Carefully inspect each piece of trim to make sure that all of your cuts are clean and precise. If necessary, use sandpaper to smooth out any rough edges or imperfections left by the angle grinder. Finally, install your baseboard corners according to your preferred method; this could include nailing them into place, gluing them together, etc.
How to Cut Baseboard Corners Using a Jigsaw?
Before starting the project, it is important to make sure you have all of the necessary tools and materials on hand. You will need a jigsaw, clamps, corner trim pieces or splines, tape measure, pencils, saw horses or cutting surface to set your baseboards on for cutting, sandpaper (optional), wood glue, T-square, and a chisel.
1. Measurements and Layout:
With your tape measure and pencil in hand, begin by measuring the length of each wall section where the baseboard will be installed. Mark off any angles needed for tight corners. Place the baseboards onto your saw horses or cutting surface with the face-up and use a T-square to draw a line along each side of the corner you will be cutting. Make sure this line is straight, as it will serve as a guide when cutting the jigsaw blade later on.
2. Using a Jigsaw:
Clamp the board firmly in place before beginning to cut. Set up your jigsaw according to the manufacturer’s instructions. Make sure that it has been set correctly for woodworking projects prior to using it. Carefully start making your cut by following the line drawn earlier with slow, steady pressure. Do not force the blade or apply too much pressure. This could cause damage to both the board and the blade itself. Stay close to the layout line as you cut, stopping when necessary to adjust the angle of the blade or to reposition the clamps if needed.
3. Fitting Corner Trim Pieces or Splines:
Once your baseboard corners have been cut, it is time to fit them with corner trim pieces or splines. Measure each piece before cutting it and mark off any angles needed for tight corners. Once all of your pieces have been cut, use wood glue to secure them in place on both sides of each joint. Finally, sand down any rough edges with sandpaper (optional).
4. Finishing Touches:
Check that all joints are secure before wiping away any excess glue with a damp cloth. Your baseboard corners should now be completely installed and ready to be painted or stained according to your preferences.
Using a jigsaw is an efficient way to cut baseboard corners for any woodworking project. With the right tools, measurements, and layout techniques, you can achieve accurate cuts. Accurate cuts will provide a professional finish for your space. With these tips in mind, you’ll be able to easily install perfect baseboard corners every time.
Cut baseboard corners with a circular saw:
With a circular saw, you can cut both low or full-profile baseboards using both straight and square bevel cuts. Now you follow these steps:
- Drill four nail holes and place two holes at the top and bottom. Check carefully that holes are not so close to each other.
- Use the hammer on each exposed side of the block to put trim nails through the holes.
- Quantify and make a mark on the molding in the stage that you wish to cut on it. When it is a miter cut, then mark from either the short or the long stage of the miter. But be sure that you check whether it is a left or right-hand miter.
- Put the blade thickness on the saw. The blade thickness should be no longer than 1/4 inch deeper than the depth of the molding. By way of instance, if the molding is 3/4 inch, then set the blade thickness at 1 inch. Loosen the wing nut onto the saw guard and proceed up the shield or down to set the thickness. Tighten the nut once completed.
- Put it to the edge of the molding. The medial side of the shield ought to be aligned with all the 45-degree facets of this speed square. Pull the trigger and then push the saw ahead, keeping it tight against the rate square. Cut through the molding using a smooth motion after the speed square. Let go of the cause.
Final Verdict:
Cutting baseboard corners without a miter saw has so many ways. It can complete by using a few different tools, such as a hand saw, angle grinder, or jigsaw. Depending on the size of your project and the materials you’re working with, one of these methods may work better for you than another. With patience and practice, you’ll be able to perfect your skills in no time!


