
To adjust a Dewalt miter saw for a 45-degree angle, simply follow these steps: unlock the bevel angle adjustment lever on the rear of the saw, rotate the saw to the desired 45-degree angle, and then lock the lever to secure the angle in place. It’s a simple and straightforward process.
Now let’s explore the steps in adjusting a Dewalt miter saw for a 45-degree angle. Unlock the bevel angle adjustment lever located at the rear of the saw, allowing you to rotate the saw. Once you have the saw in the desired 45-degree angle, lock the lever back in place to secure the angle.
This adjustment method is quick and easy, ensuring precise cuts for your woodworking projects.
How To Align The Saw Blade
Aligning the saw blade on your Dewalt miter saw for a 45-degree angle is a straightforward process. Start by checking the blade alignment. Ensure that the blade is perfectly parallel to the miter saw’s fence. To do this, use a combination square or a carpenter’s square to verify the blade’s orientation.
If the blade is not parallel, adjust the tilt accordingly. Locate the blade tilt adjustment knobs on the saw and loosen them. Gently tilt the blade until it aligns precisely at a 45-degree angle. Once adjusted, tighten the knobs to secure the blade in place.
Remember to double-check the alignment before using the miter saw to ensure accurate and precise cuts at the desired angle. Following these steps will help you achieve optimal results with your Dewalt miter saw.
Setting Up The Miter Gauge
To adjust your Dewalt miter saw for a 45-degree angle, you need to focus on setting up the miter gauge correctly. The miter gauge is a crucial component that allows for precise angle adjustments. Understanding how the miter gauge works is important before calibrating it.
Start by aligning the gauge with the blade and ensuring it moves smoothly. Check the accuracy using a square or protractor. Make necessary adjustments by loosening the screws and aligning the gauge to the desired angle. Tighten the screws once you achieve the correct setting.
Remember to use accurate measurements and make small adjustments to ensure precise results. With a properly set miter gauge, you can confidently tackle your woodworking projects at a 45-degree angle.
Adjusting The Bevel Angle
To adjust your Dewalt miter saw for a 45-degree angle, start by examining the bevel scale. Look for the angle indicator and loosen the bevel lock knob. Gently rotate the saw blade, aligning it with the desired angle on the scale.
Once aligned, tighten the bevel lock knob to secure the blade in place. To make fine adjustments, use the micro-adjustment bevel knob if your saw has one. This will allow you to dial in the angle with precision. Ensure that the bevel angle is accurate by making test cuts and checking for accuracy.
Remember to follow all safety precautions and refer to your miter saw’s manual for specific instructions. With these steps, you can easily adjust your Dewalt miter saw for a 45-degree angle.
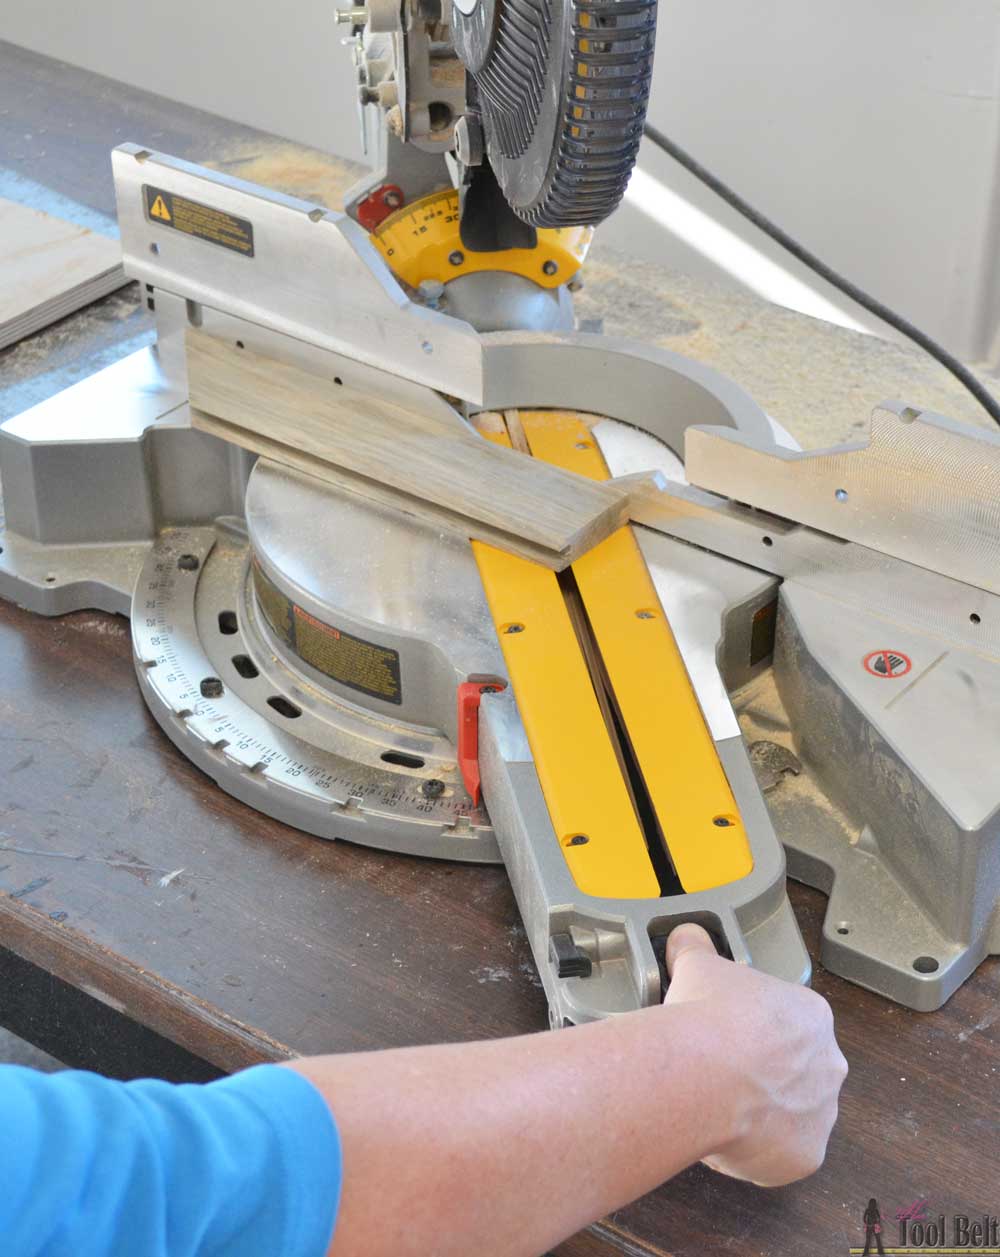
Credit: www.hertoolbelt.com
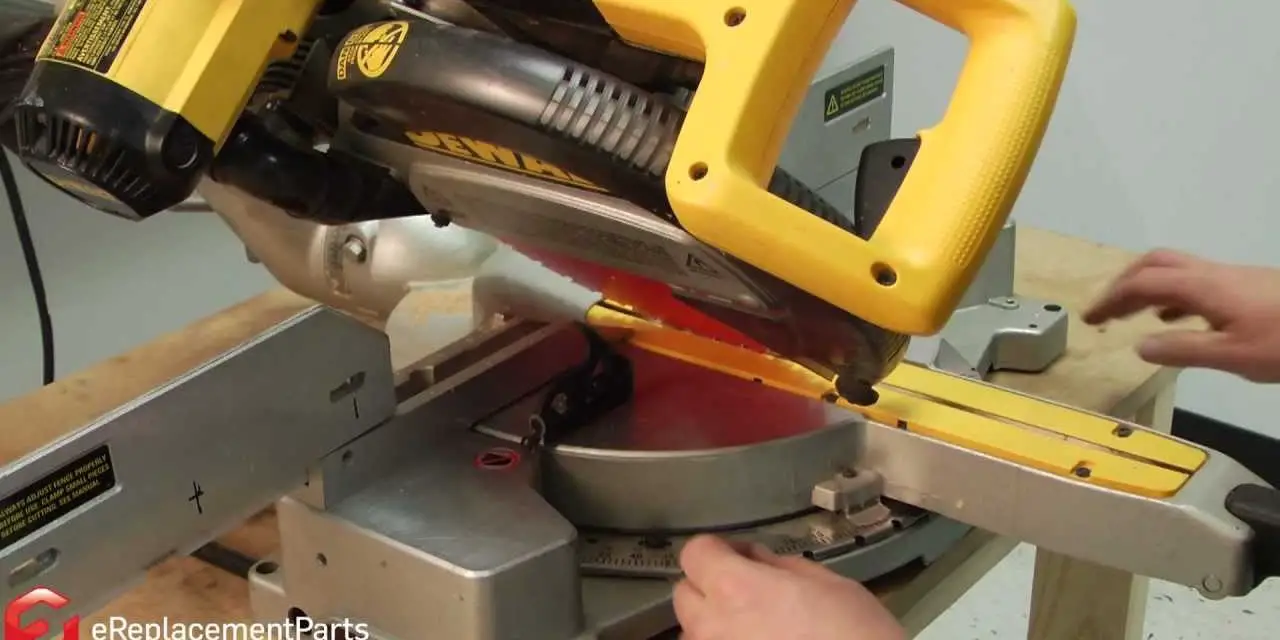
Testing The Accuracy Of The 45 Degree Angle
To adjust a Dewalt miter saw for a 45-degree angle, it is crucial to test its accuracy. By verifying the precision of the cut, you can ensure that the saw is properly aligned. Start by making a test cut on a scrap piece of material at the desired angle.
Check the resulting cut for any deviations from the ideal 45-degree angle. If corrections are necessary, use the saw’s adjustment knobs or screws to fine-tune the angle. Make incremental adjustments and retest until the desired accuracy is achieved. By following these steps, you can confidently adjust your Dewalt miter saw for a precise 45-degree angle for your woodworking projects.
Frequently Asked Questions On How To Adjust Dewalt Miter Saw For 45 Degree Angle?
How Do You Cut A 45 Degree Angle With A Dewalt Miter Saw?
To cut a 45-degree angle with a Dewalt miter saw, follow these steps: 1. Secure the material to be cut firmly against the fence of the saw. 2. Adjust the saw’s miter gauge to the 45-degree angle position. 3. Align the mark on the material with the saw blade.
4. Hold the material firmly in place and activate the saw. 5. Slowly and steadily guide the material through the blade, maintaining a steady grip. Remember to wear appropriate safety gear like goggles and gloves while operating the saw. By following these steps, you can accurately cut a 45-degree angle with a Dewalt miter saw.
Happy cutting!
How Do You Cut 45 Degree Trim With A Miter Saw?
To cut 45 degree trim with a miter saw: 1. Measure and mark the desired length on the trim. 2. Set the miter saw to a 45 degree angle by adjusting the bevel and miter controls accordingly. 3. Place the trim against the miter saw fence, ensuring it is secure and stationary.
4. Slowly lower the saw blade onto the trim, making sure it aligns with the marked cutting line. 5. Firmly hold the trim throughout the cut to prevent movement. 6. Complete the cut by smoothly pushing the saw through the trim.
7. Check the accuracy of the cut using a protractor or angle gauge if needed. Cutting 45 degree trim with a miter saw requires measuring, setting the correct angle, securing the trim and making a careful cut. Remember to exercise caution and wear appropriate safety gear throughout the process.
How Do You Angle A Dewalt Miter Saw?
To angle a Dewalt miter saw, follow these steps: 1. Adjust the bevel angle: Locate the bevel adjustment knob or lever and loosen it. Tilt the saw’s arm to the desired angle, then tighten the knob or lever to lock it in place.
2. Set the miter angle: Locate the miter adjustment knob or lever and loosen it. Rotate the base of the saw to the desired angle, aligning the angle indicator with the desired degree mark. Finally, tighten the knob or lever to secure the angle setting.
3. Check the angles: Before cutting, verify that both the bevel and miter angles are set correctly. Use a combination square or a protractor to double-check the accuracy of the angles. 4. Perform the cut: Position the workpiece against the saw fence and hold it firmly.
Activate the saw and slowly lower the blade onto the workpiece, following all the appropriate safety precautions. By following these steps, you can easily and accurately angle a Dewalt miter saw for various woodworking projects. Happy cutting!
Conclusion
Adjusting the Dewalt miter saw for a 45-degree angle is a simple process that can greatly enhance the versatility of this powerful tool. By following a few easy steps, you can ensure precise miter cuts that meet your specific project needs.
Start by loosening the bevel angle gauge and adjusting it to the desired 45-degree angle. Then, tighten the gauge to secure the setting. Next, adjust the miter angle gauge and lock it in place. Finally, double-check your measurements and make any necessary fine-tuning before making your cut.
Remember to always prioritize safety and wear protective gear when operating power tools. With a properly adjusted Dewalt miter saw, you’ll be well-equipped to tackle a wide variety of woodworking projects. So go ahead, confidently take on your next DIY endeavor and unleash the full potential of your Dewalt miter saw!


