
If you have ever utilized a miter saw to reduce long, unsupported supply, you recognize what a headache it is to handle a saw that moves all over the place while you’re trying to make cuts. Yes, you can purchase a miter saw stand, however, they’re expensive and, honestly, not virtually as versatile or easy to use as this homemade miter saw table.
This miter saw table sustains longboards. It offers a fence that you can fit with stops for making recurring the same cuts. It locks down your saw so it will not move while you’re functioning. Built-in cubbyholes offer you a place to store all those little parts and tools that opt for any type of carpentry task. Just leave the saw on board and move the entire system into your pickup truck for on-the-road work. Or loosen up the wingnuts, get rid of the saw, and also carry it away on its own. This table is additionally a terrific workbench for more than simply cutting. You’ll discover it a helpful system for all those little carpentry jobs that are part of any kind of job, as well as it’s right there where you require it.
How to Build a Miter Saw Table (DIY):
A miter saw table is an essential tool for woodworking projects. It provides stability, accuracy, and convenience when it comes to cutting wood. Building a miter saw table can be a rewarding and practical experience if you have the right tools, materials, and knowledge. This guide will provide step-by-step instructions on how to build your own miter saw table from scratch.
Tools and Materials Needed:
To build a miter saw table, you will need the following tools and materials:
1. A circular saw or jigsaw
2. Drill
3. Sandpaper
4. Wood glue or screws
5. Plywood boards (3/4” thickness)
6. Miter saw
7. Table legs
8. Paint or sealer (optional)
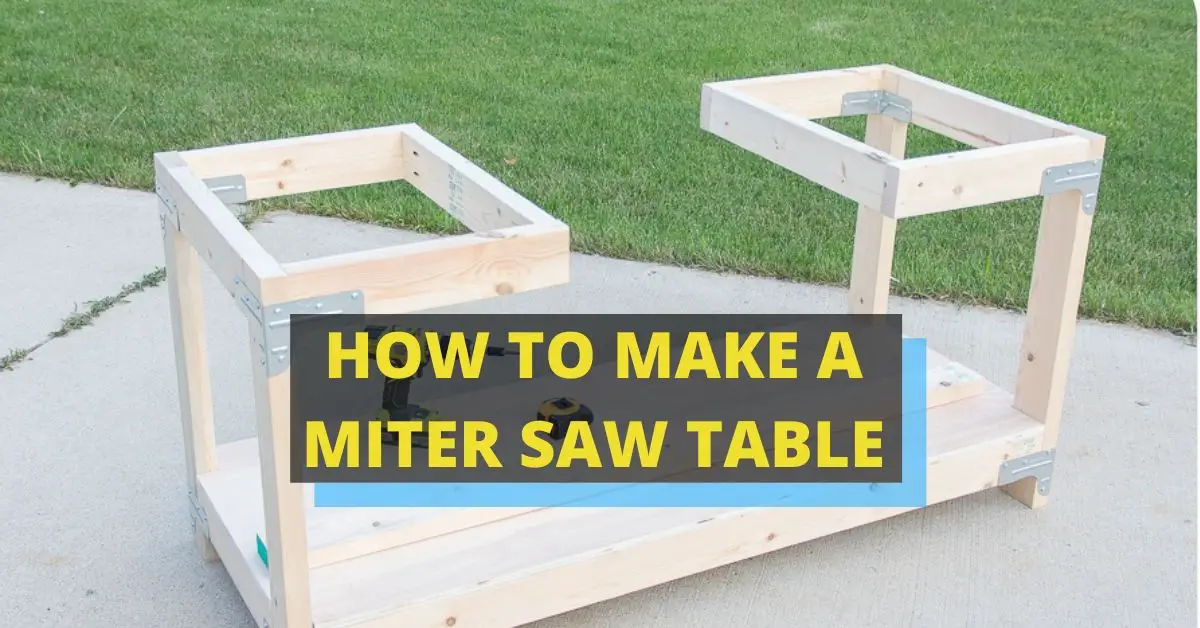
Step 1: Preparing the Plywood Base:
The first step in building a miter saw table is to prepare the plywood base. Begin by measuring the size of your miter saw and cutting the plywood boards to size, leaving at least an inch or two of extra space around all sides of your miter saw. Next, drill holes into each corner of your plywood base for attaching the table legs. If you would like a more secure base, you can use wood glue or screws instead of just drilling holes.
Step 2: Attaching the Table Legs:
Once you have the holes drilled into your plywood base, it’s time to attach the table legs. This step is important for stability and will ensure that your miter saw table does not wobble when in use. Use screws or bolts to secure the table legs onto the plywood base. Make sure to tighten them firmly so that they are secure.
Step 3: Finishing the Table Top:
Once you have attached the table legs, sand down any rough edges on the plywood or anywhere else on the miter saw table before applying a finishing touch such as paint or sealer (optional). This will help protect your miter saw table from wear and tear and make it look more attractive if desired.
Step 4: Installing the Miter Saw:
Now that your miter saw table is prepared and complete, it’s time to install the miter saw. Using screws or bolts, attach the miter saw securely onto the plywood base making sure that it sits at a comfortable height for you to use. Make sure to double-check all of your work before using the miter saw table.
The best miter saw stand on the market:
If you are looking for a miter saw stand, there are many options available on the market today. To help you find the best miter saw stand for your needs, we have put together a list of some of our favorite picks.
The first product we recommend is the Dewalt DWX723 Heavy Duty Miter Saw Stand. This heavy-duty aluminum stand features an adjustable work height and easy setup and transport. It can hold up to 500 pounds of material, making it perfect for larger projects. The stand also has quick-release levers that make it easy to adjust and attach to your miter saw as needed.
Another great option is the Keter Folding Table Saw Stand with Wheels. This compact and lightweight stand is perfect for job sites or workshops. It features adjustable legs and an extendable frame, allowing you to adjust it to your desired height. The folding design makes it easy to store when not in use. Additionally, the wheels make it easy to transport from one work site to another.
Finally, if you’re looking for something a bit more versatile, the Bosch GTA3800 Folding Leg Miter Saw Stand may be perfect for you. This heavy-duty stand features multiple adjustment points for maximum convenience and stability when cutting larger pieces of material.
Final Verdict:
Miter saw tables are an invaluable tool for anyone who works with wood and other materials. They provide a safe, sturdy platform on which to make precise cuts and angles, saving the user time and effort in the process. Whether you’re a hobbyist or professional, having a miter saw table is essential for achieving accurate results in your projects.
Building a miter saw table is not as difficult as it may seem. With the right tools, materials, and knowledge, anyone can build their own miter saw table from scratch! Just follow these steps and you’ll be ready to make accurate and precise cuts in no time.


